DIY Microgreen Kits: Grow Fresh Greens at Home
Imagine growing nutrient-packed greens right in your kitchen with minimal effort. DIY Microgreen Kits have made indoor gardening exciting. They let you produce fresh, healthy produce in just 1-2 weeks. These tiny greens have up to 40 times more nutrients than mature veggies.
Indoor gardening supplies like microgreen growing kits make anyone an urban farmer. They’re perfect for small apartments or limited outdoor space. With a few simple tools and some seeds, you can turn your countertop into a mini garden.
Microgreens are more than a trend; they’re a nutritional powerhouse. They’re full of vitamins A, C, E, K, and lutein. These tiny greens offer amazing health benefits, from lowering blood pressure to helping with weight management.
Key Takeaways
- Grow fresh microgreens in just 1-2 weeks
- Nutrients up to 40 times more concentrated than mature vegetables
- Minimal space required for indoor growing
- Low-cost alternative to store-bought microgreens
- Easy to grow with simple DIY microgreen kits
What are DIY Microgreen Kits?
Microgreens are tiny, nutritious plants that can change your home gardening. They are not just sprouts but baby plants full of flavor and health benefits.
Organic microgreen kits have changed how we grow fresh greens at home. These kits make it easy for anyone to grow their own food, no matter their gardening skills.
Understanding Microgreens
Microgreens are young greens harvested when the first true leaves appear. They are much more nutritious than mature veggies, with some types having up to 40 times more nutrients.
Benefits of Growing Microgreens
- Incredibly high in nutrients
- Can be grown indoors in 1-2 weeks
- Require minimal space and equipment
- Provide fresh, flavorful additions to meals
- Potentially help lower blood pressure
Common Types of Microgreens
Some popular microgreen varieties for home gardening include:
- Broccoli
- Radish
- Kale
- Arugula
- Basil
With just ½ cup serving size and only 10 calories, microgreens are a great way to add nutrition to your diet. Plus, you get to grow your own food.
Essential Components of a DIY Microgreen Kit
Starting a sustainable garden at home is easy. You just need to know the basics of a microgreen setup. Even beginners can grow healthy greens in little space.

For a homemade microgreen setup, pick the right parts. This ensures your greens grow well and taste great.
Seeds: Choosing the Right Varieties
Choosing the right seeds is key for growing microgreens. Here are some top picks:
- Broccoli: Quick-growing and packed with nutrients
- Radish: Spicy and germinates fast
- Sunflower: Mild taste and full of nutrients
- Pea shoots: Sweet and can be harvested multiple times
Growing Medium: Soil vs. Soil-Free Options
The growing medium affects your microgreens. Here are some popular choices:
- Coconut coir: Keeps moisture in and is eco-friendly
- Hydroponic mats: Clean and simple to use
- Organic potting soil: Rich in nutrients and traditional
- Jute mats: Biodegradable and sustainable
Additional Tools You Might Need
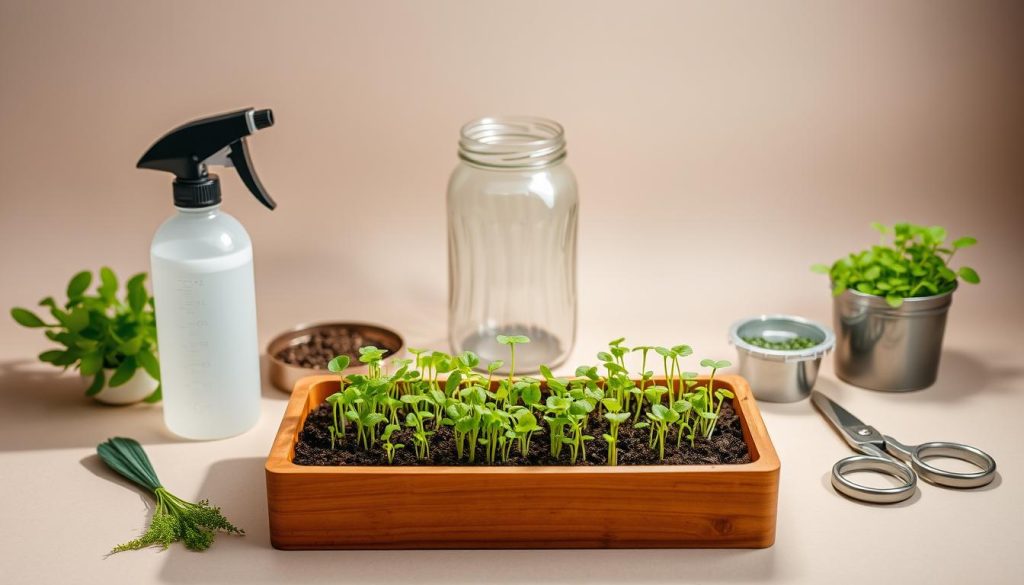
To make a full urban farming kit, get these tools:
- Shallow trays with holes for drainage
- Spray bottle for watering
- Small grow lights
- Humidity dome or plastic cover
- Digital scale for measuring seeds
With these tools, you’re set to start your gardening journey. Enjoy fresh microgreens in just 7-21 days!
How to Set Up Your DIY Microgreen Kit
Starting your home gardening with DIY microgreen kits is thrilling. It brings fresh, healthy greens right to your kitchen. Indoor gardening supplies make growing microgreens easy, needing little effort and space.
Setting up your microgreen kit needs careful planning and detail. The right steps can turn your home into a mini green oasis. Here, you can get fresh, nutritious greens in just a week or two.
Selecting the Perfect Growing Location
Find a spot with steady temperature and indirect light. Great places include:
- Kitchen countertops
- Windowsills with filtered sunlight
- Shelves near natural light sources
Preparing Your Growing Containers
When picking containers for your DIY microgreen kits, keep these points in mind:
- Make sure they drain well
- Use shallow trays (2-3 inches deep)
- Clean containers well before starting
Sowing Seeds Effectively
Seed sowing is key for growing microgreens well. Spread seeds evenly over the moist growing medium. This should be dense but not too crowded. Most microgreen seeds sprout in 2-7 days, with radish ready in just 7 days.
Popular seeds for microgreens are sunflowers, broccoli, kale, peas, and basil. Always use seeds labeled for microgreen growth for the best results in your indoor garden.
Watering and Care for Your Microgreens
Successful microgreen growing kits need careful watering and the right environment. Urban farming essentials include knowing the balance of moisture and light for these greens.
Proper Watering Techniques
Watering microgreens is all about precision. For sustainable gardening, follow these tips:
- Use bottom watering after initial germination to prevent mold growth
- Maintain consistent moisture without oversaturating the growing medium
- Aim for 1½ to 2 cups of water daily, adjusting based on microgreen variety
Light Requirements
Microgreens need the right light to grow well. Place your kit near a bright window or use grow lights. Most need 4-6 hours of indirect sunlight or artificial light daily.
Monitoring Growth
Watching your microgreens daily is key. Check the growing medium for:
- Consistent moisture levels
- Even seed germination
- Signs of potential issues like mold or uneven growth
Pro tip: Keep room humidity between 40-50% to prevent mold and support healthy growth. Your microgreen kit will give you fresh, nutritious greens in just 7-14 days!
Harvesting Your Microgreens
Growing microgreens at home is very rewarding. They are ready to harvest in 7 to 14 days. This makes them perfect for city living and gardening lovers.

Identifying the Perfect Harvest Time
Finding the right time to harvest your microgreens is key. Most are ready in 10 days, but it can vary. Look for these signs:
- Fully developed cotyledon leaves
- Vibrant color and healthy appearance
- Approximately 1-2 inches tall
- No yellow or wilting leaves
Proper Harvesting Techniques
Harvesting methods differ for each microgreen type. Here’s a simple guide for the best results:
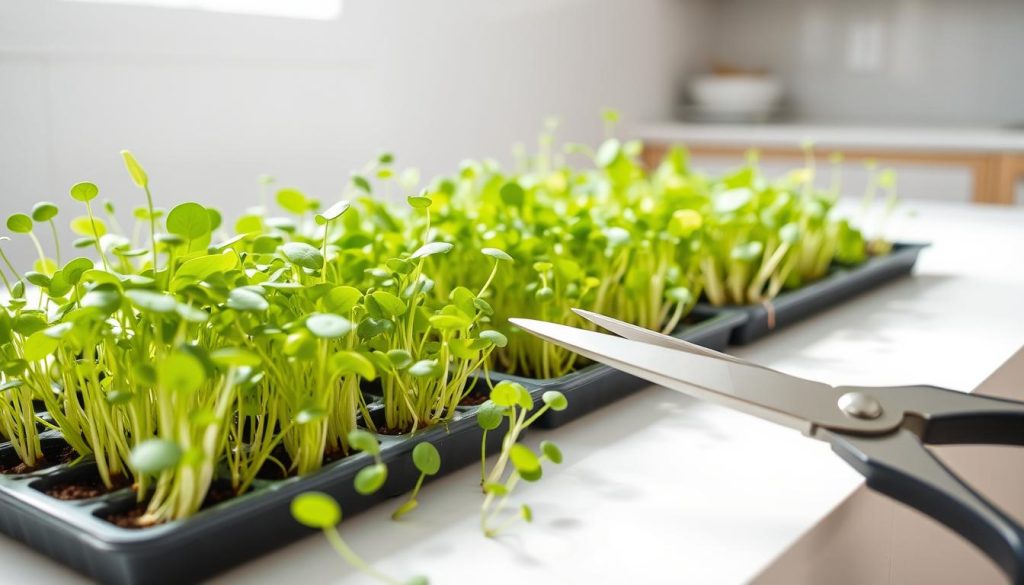
- Use clean, sharp scissors for cutting
- Cut just above the soil line
- Harvest in the morning for maximum freshness
- Rinse gently with cool water
- Pat dry with a clean paper towel
Some microgreens, like radishes, can be pulled. Leafy ones are best cut with scissors. Harvesting at the right time will give you the tastiest microgreens.
Creative Ways to Use Microgreens in Your Cooking
DIY Microgreen Kits are more than just a gardening project. They open up a world of flavors and colors in your kitchen. These small greens can turn simple meals into something special.
Flavor Pairings and Versatile Uses
Organic microgreen kits let you grow many types of greens. Here are some ways to use them:
- Add to salads for extra crunch and nutrition
- Garnish sandwiches and wraps
- Top pizzas and pasta dishes
- Blend into smoothies for a nutritional boost
- Enhance soups and stews with fresh microgreens
Garnishing with Style
Microgreens are more than just a topping. They’re a way to add flair to your dishes. Try radish, mustard, or chive greens on guacamole, in tacos, or on desserts.
Nutritional Powerhouse
Microgreens are not just tasty. They’re also packed with vitamins, minerals, and antioxidants. Adding them to your meals boosts your nutrition and flavor.
Troubleshooting Common Issues with Microgreens
Growing microgreens can sometimes be tricky. Knowing the common problems helps keep your garden healthy and productive. Whether you’re using simple seed starting kits or more advanced microgreen growing kits, it’s important to know how to fix common issues.
Recognizing Pests and Diseases
Mold is a big problem in growing microgreens, especially in warm places. It’s important to know the difference between harmless root hairs and dangerous mold:
- Root hairs grow directly from the sprout’s base
- Mold appears as a spiderweb-like substance on seed surfaces
- Keep humidity levels low to prevent mold growth
Nutrient Deficiencies
Look out for signs of nutrient problems in your microgreens:
- Yellowing leaves indicate insufficient light
- Stunted growth suggests nutrient imbalances
- Use high-quality seed-starting mix for optimal nutrition
Environmental Challenges
For successful microgreen growth, keep conditions just right:
- Maintain temperatures between 65-70°F
- Ensure adequate light after initial germination
- Distribute seeds evenly to prevent crowded growth
With careful attention and these tips, your microgreen growing kits can produce vibrant, healthy greens all the time.
Tips for Maximizing Your Microgreen Yield
To succeed with DIY microgreens, plan well and use smart growing methods. These tips can make your home garden a place for fresh, healthy greens all the time.
Improving your microgreen harvest needs a few key strategies. These can greatly boost the quality and amount of your greens.
Rotating Crops for Continuous Harvest
Rotating crops is key to a steady microgreen supply. Use several containers to keep growing:
- Start new trays every 7-10 days
- Stagger planting schedules
- Maintain two different containers at various growth stages
Experimenting with Different Varieties
Try different microgreens to add flavor and nutrition to your garden. Here are some popular ones:
- Radish (quick-growing, spicy flavor)
- Broccoli (high in nutrients)
- Sunflower (mild, nutty taste)
- Arugula (peppery profile)
Utilizing Nutrients Effectively
Good nutrient management is vital for strong microgreen growth. Here’s how to do it:
- Use balanced organic fertilizers
- Maintain pH levels between 6.0-6.5
- Apply 50-100 ppm nitrogen solutions
- Monitor soil temperature (60-75°F)
With these tips, your garden can become a thriving microgreen farm.
Where to Buy DIY Microgreen Kits
Finding the right DIY microgreen kit can change your indoor gardening. Many online stores and local shops sell seed starting kits. This makes growing microgreens easy and fun.
Online sites like Amazon and gardening websites have lots of microgreen kits. One great kit costs $35.00 and comes with non-GMO seeds and a grow guide. It has 524 positive reviews, with people saying they got great results in just one week.
If you like shopping in person, local garden centers and eco-friendly stores have DIY microgreen kits. You can see the materials like coconut fiber grow bags before buying. You can even make your own kit with fabric bags, coco peat, and organic seeds.
For those who care about the planet, modern microgreen kits are a good choice. They use compostable materials and eco-friendly packaging. Whether you’re new to gardening or experienced, there’s a kit for you to grow fresh greens at home.