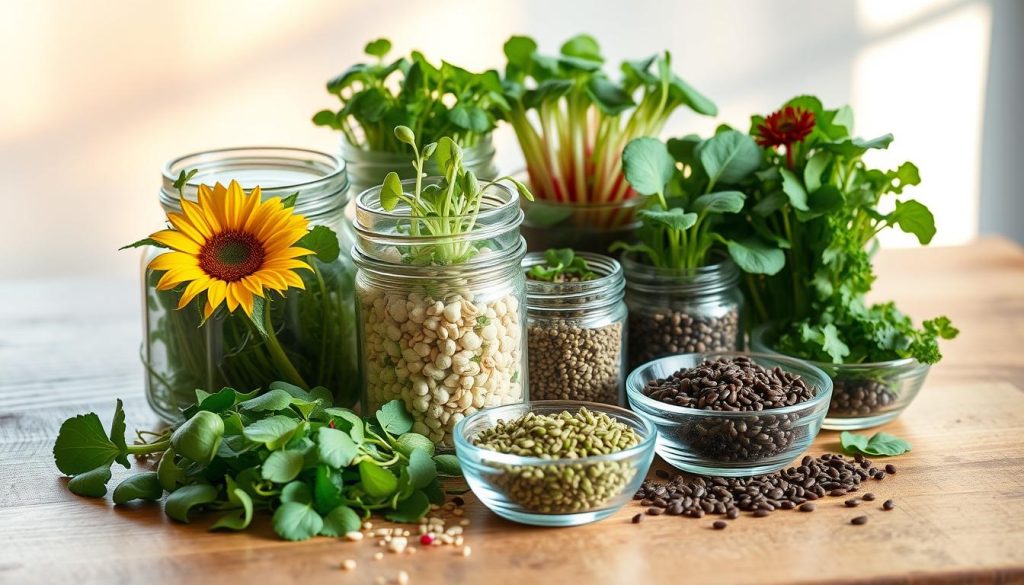
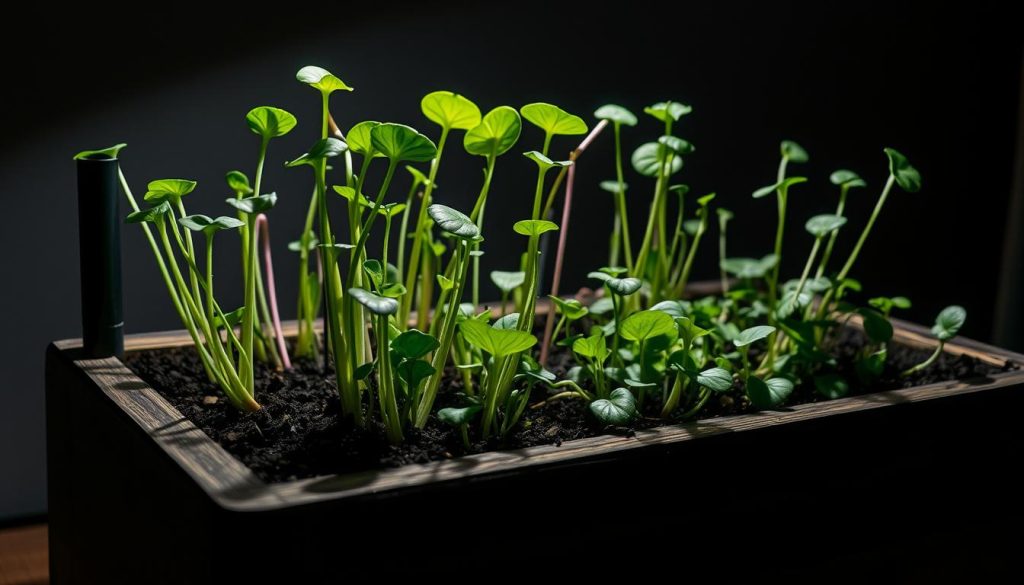
Cultivate Microgreens at Home with These DIY Tips
Explore the world of microgreens, a great way to boost your home cooking and health. These small plants are packed with nutrients, making them easy to grow at home. In just 1-2 weeks, you can have fresh greens right on your kitchen counter.
Microgreens are young greens from vegetables, picked when they’re still small. They need very little space and can grow indoors easily. For example, broccoli sprouts have 40 times more nutrients than full-grown broccoli, making them a superfood you can grow yourself.
Starting with microgreens DIY projects is a great way to begin gardening at home. It gives you fresh, healthy greens with little effort. Whether you love cooking or care about your health, growing microgreens can change how you see fresh produce.
Key Takeaways
- Microgreens can be grown indoors in just 1-2 weeks
- These tiny greens contain up to 40 times more nutrients than mature vegetables
- Perfect for small spaces and indoor cultivation
- Easy to grow with minimal gardening experience
- Provides fresh, nutrient-dense greens at home
Introduction to Microgreens
Microgreens are tiny powerhouses of nutrition that have taken home gardening by storm. These miniature vegetable greens are harvested just 7-21 days after planting. They are perfect for beginner microgreens projects. Unlike full-grown vegetables, microgreens pack an incredible nutritional punch.
What are Microgreens?
Microgreens are young vegetable greens harvested shortly after the first true leaves develop. They are smaller than baby greens but larger than sprout varieties. They can be grown easily in small spaces, including windowsills. This makes them ideal for microgreens cultivation ideas.
Health Benefits of Microgreens
These miniature greens are nutritional superheroes. They contain concentrated levels of vitamins and minerals. Often, they boast 4 to 10 times more nutrients than mature vegetables. Rich in vitamins E, C, and K, microgreens also provide essential minerals like:
- Potassium
- Iron
- Zinc
- Magnesium
- Copper
Popular Varieties to Grow
For those starting their first microgreens project, several varieties are beginner-friendly and delicious. Some top choices include:
- Broccoli
- Radish
- Arugula
- Basil
- Beets
- Sunflower
Each variety offers unique flavors and nutritional profiles. This makes microgreen cultivation an exciting and rewarding hobby for home gardeners of all skill levels.
Essential Supplies for Growing Microgreens
Starting a microgreens DIY project needs the right tools and preparation. Whether you’re new or have gardening experience, knowing the key supplies is crucial. It helps you grow microgreens successfully.
Choosing the Right Containers
Choosing the right containers is key for growing microgreens. You’ll need two main trays:
- A tray with drainage holes (10×10 inches, 2 inches deep)
- A solid tray without holes to catch water
Many gardeners use recycled containers. It’s a green and cost-effective way to grow microgreens.
Soil Selection for Optimal Growth
Organic potting soil is the best base for microgreens. Here are some tips for soil preparation:
- Use high-quality organic potting mix
- Avoid soil with heavy chemical additives
- Consider coco coir as an alternative growing medium
A 2.5 cubic foot coco coir block can make over 18 gallons of potting mix. It’s a great deal for your DIY project.
Lighting Requirements
Good lighting is vital for microgreens to grow well. They need 14 to 16 hours of light a day. You can use:
- Natural sunlight near a bright window
- LED grow lights for consistent illumination
- Affordable LED light packs (typically around $39.99)
With these supplies, you’re ready to start your microgreens journey. It can turn a simple DIY project into a thriving garden.
Choosing the Right Seeds for Your Project
Choosing the right seeds is key for a successful DIY microgreens garden. The right seeds can make your microgreens project a hit. Knowing the basics is important for growing healthy and tasty microgreens.

Recommended Seed Sources
When starting your microgreens journey, quality seeds are crucial. Look for suppliers known for:
- Organic, non-GMO certified seeds
- Seeds specifically labeled for microgreens
- High germination rates
- Variety of seed options
Best Seeds for Beginners
For beginners, some seeds are easier to grow and faster. Top picks include:
- Radish: Fast-growing and mild flavor
- Broccoli: Nutrient-dense and easy to cultivate
- Arugula: Peppery taste with quick germination
- Cilantro: Unique flavor profile
Specialty Varieties to Try
Once you’re more confident, try unique seed varieties. Amaranth, kale, and basil offer exciting flavors and nutrition. Some specialty seeds might need more care but offer amazing culinary experiences.
Most microgreens take 7-21 days to harvest, with best soil temperatures between 60-75°F. Start small, experiment, and enjoy your homegrown microgreens!
Step-by-Step Guide to Growing Microgreens
Growing microgreens at home is fun and rewarding. It can change how you cook. These small plants are full of nutrients and great for adding fresh greens to your meals.
To grow microgreens at home, start with preparation. Follow these key tips for a successful harvest:
Preparing Your Growing Containers
Choose clean, shallow trays with holes for drainage. Make sure to sanitize them well to avoid bacteria. A standard tray size is 10″ x 20″, which is perfect for growing microgreens.
Seed Sowing Techniques
- Choose good quality seeds for microgreens
- Soak big seeds like sunflower or pea shoots for 4-6 hours before planting
- Plant 10-12 seeds per square inch for small varieties
- Spread seeds over moist growing medium
Watering and Maintenance Tips
Watering and keeping an eye on your microgreens is crucial. Here are some important tips:
- Keep the soil moist but not too wet
- Mist seeds every day when they’re germinating
- Give them 6-8 hours of light daily
- Keep the temperature between 65-70°F
- Keep humidity at 40-60%
With these tips, you’ll be harvesting your first batch of greens in 7-14 days. Remember, the more you grow, the better you’ll get.
Common Mistakes to Avoid When Growing Microgreens
Starting microgreens DIY projects is exciting for beginners. Knowing common mistakes helps grow healthy microgreens. Let’s look at the main challenges for beginners.

Water Management Challenges
Water is key in growing microgreens. Finding the right balance is hard. Here are some water issues:
- Too much water causes mold
- Not enough water makes plants wilt
- Uneven watering messes up seed germination
Light Exposure Complications
Light is crucial for microgreens. Too little light makes plants weak. Here’s what to do:
- Give 4-8 hours of direct sunlight daily
- Use 30-watt LED grow lights indoors
- Rotate trays for even light
Timing and Harvesting Errors
Timing is a big challenge for beginners. Knowing when to harvest is key. Most microgreens need 7-21 days to be ready. Watch for signs of readiness to avoid losing nutrients.
By avoiding these mistakes, you’ll get better at growing microgreens. You’ll enjoy healthier, more plentiful harvests.
Harvesting Your Microgreens
Growing microgreens is an exciting journey that ends with harvesting. Knowing when and how to cut your microgreens is key. It ensures you get the most flavor and nutrition from your DIY project.
Timing Your Harvest for Peak Flavor
Microgreens need perfect timing to be at their best. Most are ready in 7 to 21 days after planting. Look for these signs:
- Fully developed seed leaves
- Plants reaching 2-3 inches tall
- Before true leaves fully develop
Cutting Techniques for Healthy Microgreens
Harvesting right is important for your greens. Use sharp, clean scissors to cut just above the soil. This keeps your greens clean and prevents soil contamination.
Storing Your Fresh Microgreens
After harvesting, keeping them fresh is key. Here’s how:
- Use clean, airtight containers
- Place dry paper towels between layers
- Refrigerate immediately
- Consume within 3-5 days for best quality
Learning to harvest well means you’ll enjoy tasty, nutritious microgreens from your garden.
Creative Ways to Use Microgreens in Cooking
Turning your microgreens DIY projects into tasty dishes is simple. These small, nutrient-rich greens can make your meals special with just a little effort.
Microgreens are super versatile in the kitchen. They’re full of nutrients and flavors, making your dishes stand out.
Salad Sensations
Make salads that are not only healthy but also full of flavor. Here are some tips for amazing salad mixes:
- Mix 3-5 different microgreen varieties for complex flavor profiles
- Combine arugula, radish, and sunflower microgreens for a peppery kick
- Use microgreens as a complete salad base instead of traditional lettuce
Garnishing Magic
Make your dishes look and taste better with microgreen garnishes. Sprinkle these greens on:
- Soups and warm entrees
- Sandwiches and wraps
- Pizzas and open-faced toasts
Smoothie Boost
Boost your smoothies with microgreens. Add kale or pea shoots for protein, fiber, and nutrients. A serving can give you up to 5 grams of protein and help meet your daily vitamin needs.
Trying microgreens in your cooking can unleash your creativity. They add flavor and nutrition to everything from salads to smoothies.
Troubleshooting Microgreens Growth Issues
Starting a DIY microgreens garden can have its ups and downs. Knowing the common problems helps you grow a successful crop. Microgreens are delicate and need special care and conditions.
Identifying Pests and Diseases
Early detection is key to growing healthy microgreens. Look out for these common issues:
- White fuzzy appearance on seedlings (often root hairs, not mold)
- Unusual odors indicating potential fungal growth
- Wilting or discolored leaves
Solutions for Slow Growth
Slow growth in microgreens can be due to several reasons. Here are some tips to help:
- Check seed germination rates (aim for 75% or higher)
- Maintain optimal temperature between 65-75°F
- Ensure proper light and moisture conditions
- Use fresh, high-quality seeds
Tips for Reviving Wilting Microgreens
Keeping an eye on your microgreens is crucial. If they look stressed, try these steps:
- Adjust watering frequency
- Improve air circulation with small fans
- Check for humidity levels (keep below 60%)
- Remove affected plants to prevent spread of potential diseases
Prevention is always better than cure in growing microgreens. Regular checks and quick action can keep your microgreens healthy and thriving.
Expanding Your Microgreens Project
Starting with radishes or sunflowers opens a world of flavors and health benefits. You can grow many different types of microgreens, like basil, broccoli, and kale. These add new tastes and nutrients to your cooking.
Joining local gardening groups can boost your microgreens skills. Look for online forums or local clubs where growers share tips. This way, you can grow different greens at the same time, always having fresh ones.
Sharing your microgreens with loved ones can spark their interest. Give them small packages with a mix of greens like peas, spinach, and leeks. Your excitement might encourage them to grow their own, spreading the joy of fresh food.
As you grow your project, keep learning. Each type of seed brings its own challenges and rewards. Record your progress, try new things, and enjoy the tasty, healthy greens you grow.